Thursday 26 April 2012

iOS 5.1 For iPhone, iPad, iPod touch (A4 Devices) Can Now Be Jailbroken Using Redsn0w 0.9.10b6 [How-To Tutorial]


The iPhone Dev-Team – reliably as per usual – have updated its Redsn0w jailbreak tool, allowing those using the latest iOS 5.1 to set their devices free. It works for all iPhone, iPad and iPod touch-devices except, of course, the iPhone 4S and the iPad 2.

Additionally, as you may already be aware, the jailbreak is tethered, meaning you will need to connect your device to a computer to boot tethered each time it is switched off for whatever reason. The ‘SemiTether’ patch eases the tethered scenario by allowing devices to boot without connecting to a PC or Mac, although features are extremely limited, thus it will have to be booted tethered in order to function at optimum level once more.

pwned iphone 4s cydia jailbreak

Of course, it’s not as exciting as the fully-untethered jailbreak with all the bells and whistles; but we reckon that it’s better than no jailbreak at all!
As usual, we’ve got the tutorial to help you in your quest to jailbreak your iOS 5.1 device.
NOTE:

  • As already mentioned, this jailbreak does not work on the iPad 2 or iPhone 4S.
  • If you unlock with GEVEY or Ultrasn0w, DO NOT update to the stock iOS 5.1 firmware. Skip to the latter part of this guide for more info.
  • You will be booting tethered quite a bit, so if you don’t think you can deal with constantly connecting and rebooting, wait for an untethered or downgrade to iOS 5.0.1/4.x.
With the formalities complete, let’s start the show!


DISCLAIMER: I shall not be held responsible if you lose data or your device gets damaged in the following of this guide. Furthermore, the dev has noted that it hasn’t been tested extensively, so as usual, proceed at your own risk.


How to jailbreak iOS 5.1 using Redsn0w
Step 1: Download the latest version o
iTunes (10.6)
Step 2: Open up iTunes, and back up your device.
Step 3: Upgrade your firmware to iOS 5.1. [download links]
Here are the official download links to iOS 5.1 directly from Apple:


Step 4: Download the latest version of Redsn0w (Windows/Mac)
Step 5: Start Redsn0w, select "Jailbreak" then "Install Cydia". Follow the steps to place your device into DFU mode.


Step 6: Now we move on to the process where you will need to repeat every time your device is switched off. This is called tethered boot. Launch Redsn0w, select "Extras", then"Just Boot" in order to boot your device tethered.


Booting Semi-Tethered (Optional)
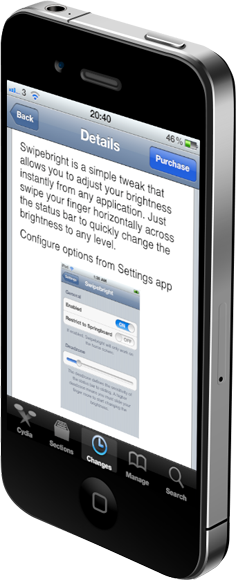
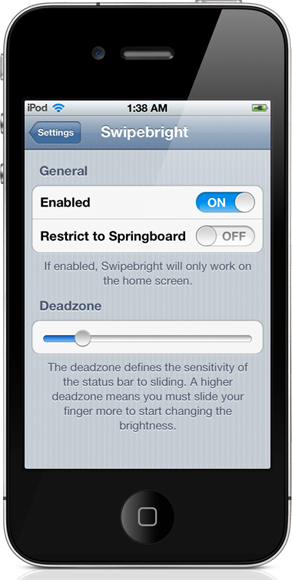
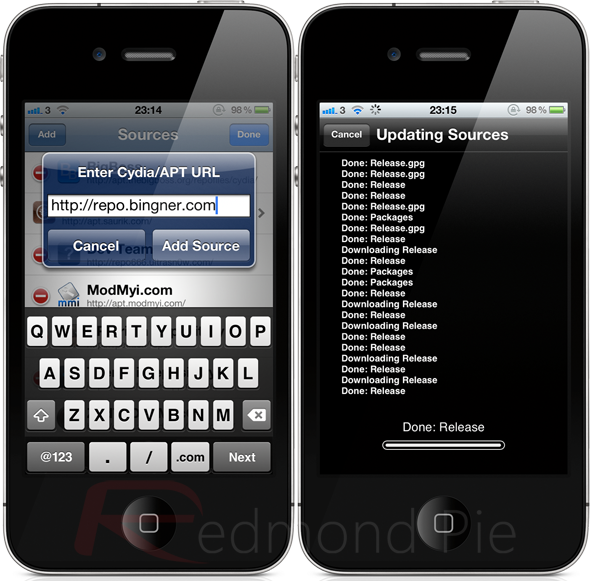
The "SemiTether" patch may work through to 5.1. It’s a cross between tethered and untethered – allowing you to boot your device without a computer, but the available features are somewhat limited, so you’ll need to boot tethered through Redsn0w in order to enjoy a fully-functional break. It’s free, and available over at the BigBoss repo: http://thebigboss.org/semitether.


Note To Unlockers:
If you use the GEVEY SIM interposer or Ultrasn0w to unlock your iPhone, you will need to create a custom .iPSW, in order to preserve your baseband.
In Redsn0w, select "Extras", then "Custom IPSW", locate your iOS 5.1 file, and let Redsn0w work its magic.
Then enter pwned DFU mode (Extras > Pwned DFU) and restore to your custom firmware via iTunes. After that, you’ll be able to unlock with GEVEY, Ultrasn0w fixer, or Ultrasn0w (when it is available).


Source : Redmond Pie


Sunday 22 April 2012

Unlock iPhone 4 On 4.11.08 And 4.12.01 Baseband Running iOS 5.1 Using The New And Improved GEVEY Ultra Interposer


Over the last day or so the unlocking aspect of the jailbreak community has seem to hit a red hot patch, with potential unlockers first all being introduced to a new method of iPhone unlocking using a procedure which takes advantage of Sam Bingner’s Subscriber Artificial Module (SAM), and now we have the news that the latest GEVEY Ultra 5.1 now supports the GSM iPhone 4 running iOS 5.1 with modem firmwares up to 04.12.01.

The update to the GEVEY Ultra SIM will come as welcome news for the many thousands of users who rely on a hardware based unlock for their iPhone 4 and the fact that the GEVEY SIM has been updated with some additional enhancements only adds to the good news. As is always the case with this type of unlock, a jailbreak is a pre-requisite, as is making sure that the iPhone has been officially activated through the iTunes software before the GEVEY Ultra is used.

gevey-ultra-iphone4

The updated GEVEY Ultra, which is available as a pre-order item from the Apple N Berry website, comes with support for the GSM iPhone 4 running on iOS versions 4.1 up to the very latest iOS 5.1, and will provide a hardware based unlock for the following basebands:
  • 01.59
  • 02.10
  • 03.10.10
  • 04.10.10
  • 04.11.08
  • 04.12.01
The new product is a newly designed chipset that doesn’t require any cutting to fit perfectly in the iPhone 4 and offers longer device battery life thanks to design changes meaning that it operates under the 3-volt standard. The manufacturers are also touting improved reception, better signal strength, consistent voice calls and a better all round data connection as upgrades to the Ultra 5.1. The availability of the GEVEY Ultra 5.1 comes hot on the heels of the revelations surrounding an unlock method found by a Chinese iOS researcher that uses the SAM package from Cydia and allows any jailbroken iPhone on any firmware to be unlocked and therefore could suffer in popularity because of this.

Unlock-iPhone

For some users, the GEVEY Ultra represents a tried and trusted method of achieving what used to be an elusive unlock for their iPhone and in some cases will choose to go down this route. The new and improved Ultra 5.1 is available as a pre-order from the Apple N Berry website at a cost of $49.99, with orders set to begin shipping by the end of April.


Source : Redmond Pie

Control Your iOS Device’s Brightness By Swiping Your Thumb On The Status Bar With SwipeBright


If you are anything like me, then you will appreciate the little Cydia tweaks that bring small changes to the way iOS operates, as well as finding yourself drawn to extensions that enhance the visual appearance of the OS in subtle but noticeable ways. Don’t get me wrong here, the larger more-in-your-face tweaks obviously have their benefits, and can be extremely helpful to some people, but it tends to be the more intricate, small and useful packages that stand the test of time.


The SwipeBright tweak that has found its way onto Cydia is a prime example of one of these simple but extremely useful tweaks and is an implementation of the brightness controls that I personally have been waiting for. When installed, SwipeBright simply allows the user to control the level of the display’s brightness by making a simple left and right swipe gesture directly onto the status bar at the top of the display. The gestures are there to represent an actual swipe on the brightness slider, meaning that a right-hand (left to right) swipe on the status bar will increase the brightness whereas a left (right to left) swipe will produce the opposite result and dim the display’s brightness.
Although not really required, SwipeBright installs with its own configurable preferences bundle directly within the native Settings app. The first of these settings allows the user to simply toggle the tweak on or off, something which I am an advocate for and believe all Cydia tweaks should come with. The second option allows users to restrict the tweak to the home screen only, meaning that SwipeBright would only be active when one of the user’s home screen is visible. If this option is set to off then the tweak can be invoked via the status bar whilst inside an app and at the device’s lock screen, as well. The third and final option relates to the tweak’s Deadzone sensitivity, and refers to how sensitive the status bar actually is to sliding. When the sensitivity slider is set to a higher level, the user will need to slide their finger more to invoke the tweak and vice versa.


SwipeBright is one of those useful but minimalistic tweaks that looks to be very well implemented and something most users will find useful. The only issue that I experienced, was needing to set an alternative Activator option for SBSettings due to the fact that it used a left swipe on the status bar to activate the drop down. SwipeBright is available from the BigBoss repository at a cost of $0.99 and is compatible with iOS 4 and above.


Source : Redmond Pie

How To Unlock Any Jailbroken iPhone On Any Baseband And Firmware


It seems that jailbreakers and potential unlockers are having to wait longer and longer for news to cheer about as the cat and mouse game with Apple and the networks becomes more and more difficult for those involved in producing jailbreaks and iPhone unlocks. Once upon a time, when a new firmware was released, it didn’t seem to take that long for the development teams to pull something together to release to the public, but as time progresses it also seems that the difficulty levels involved in this kind of work is increasing dramatically.
With that in mind, the news this morning, brought to the attention of the masses by iPhone Dev-Team leader MuscleNerd, should certainly raise a smile on the faces of those who require a network unlock on their jailbroken iPhone. MuscleNerd has confirmed that a Chinese researcher by the name of Loktar_Sun has discovered a method for unlocking jailbroken iPhones with the help of the Subscriber Artificial Module (SAM) by Sam Bingner.

Unlock-iPhone

The release of the method comes after the researchers and developers involved delved deeper into the possibilities that the SAM package provided, something that MuscleNerd himself concedes he and his team didn’t do effectively. To proceed with the unlock, users will need a few things which are detailed below. It is also worth noting that this unlock method produces a ticket that is valid only for the SIM card that is used during the procedure, meaning that if you have additional SIM cards that you wish to use in the unlocked iPhone, you will need to repeat the process with each SIM.

NOTE : I SHOULD NOT BE HELD RESPONSIBLE FOR ANY DAMAGE TO YOUR DEVICE.
BEFORE GOING THROUGH PROCEDURE HAVE A BASIC UNDERSTANDING OF THE DEVICE.

Requirements: Before following this procedure, users will need to have a jailbroken iPhone that is not listed on any IMEI blacklists. A computer with a fully working internet connection and the latest version of iTunes installed is also required, as is the original carrier information of the locked device in question.

Step 1: Open up Cydia on the jailbroken iPhone and add the official repository for the SAM package. The repo URL is http://repo.bingner.com and contains the official up to date SAM package and the required dependencies.


Step 2: Launch the SAM interface. This can be achieved by tapping the SAMPrefs icon that can be found on your Springboard, or by finding the SAM preferences bundle through the Settings.app. Make sure that the SIM card that you intend to use is present in the iPhone.

Step 3: After SAM has been launched, select the ‘Utilities‘ option before selecting ‘De-Activate iPhone‘. If this has been done correctly, the device ActivationState should now read as ‘Unactivated‘.

Step 4: Keep SAM enabled and choose ‘By Country and Carrier‘ in the Method options. The next step is to find your carrier in this list. Be aware that some networks work with more than network ID, therefore meaning users may need to select the ‘SIM ID‘ option.

Step 5: Head on over to ‘More Information‘ and make a note of the IMSI that is present in the ‘SAM Details‘ section before tapping ‘Spoof Real SIM to SAM‘. Head back to the main SAM screen and change ‘Method‘ to manual and paste or enter the IMSI string that you should have made a copy of.

Step 6: The next step is to connect the iPhone to the computer using the supplied USB cable and allow iTunes to re-activate the phone. When done, double click the Phone Number section of the device details and make sure that the displayed ICCID matches that found on the SIM card. If the strings do not match, the process will need to be repeated from the beginning.


Step 7: If the strings match then unplug the device and disable the SAM package. Re-connect the device to iTunes and do not be alarmed by any error messages that may pop-up saying that the device cannot be activated. This error is normal and requires iTunes to be shut down and then re-opened.

Step 8: After a short period of time, the iPhone should display those beautiful signal bars meaning that the process has been successful. If you find that push notifications have ceased working, this can be resolved by selecting the ‘Clear Push‘ option in SAM and then connecting the device to iTunes.

As mentioned earlier on, following this procedure means that the iPhone will only work with the SIM that was used during the unlock process. If you intend on using multiple SIM cards with the unlocked iPhone then the process will need to be repeated with each SIM on an individual basis. The team involved in producing this unlock have also recommended it as good practice to make a manual save of each ticket that is generated due to the fact that it could prove crucial going forward.

Manually saving each valid unlock ticket


Step 1: Run through Steps 1-8 above for each required SIM card, making sure that the method is successful each time.

Step 2: SSH into the jailbroken device using something like iFile or a desktop client.

Step 3: Navigate to /var/Root/ibrary/Lockdown and make a local copy of everything that is found in that directory for each SIM card.

There you have it, a somewhat lengthy but extremely worthwhile method to unlocked a jailbroken iPhone using the SAM package. Enjoy the freedom.


Source : Redmond Pie

Use Your PC’s Internet Connection On Android With Reverse Tether App


The ability to tether out our smartphone (or tablet’s) cellular connection is of massive convenience, and can sometimes be a great life-saver when the primary source ceases to operate.
If you experience a power-cut, for example, the chances are, use of your Wi-Fi hub is cut with it, leaving you with no option but to use your smartphone – provided, of course, you keep it topped up with ample amounts of juice.

There aren’t many apps, however, which work the other way round, allowing your device to use your computer’s connection. Why not just hook up to the same Wi-Fi as the computer? I hear you cry. Well, in some circumstances, this isn’t always a possibility. For example, not all connections – as hard as it may be to believe for some – are Wi-Fi, and some do still connect via DSL modems instead.

Reverse Tether

Although most do have their own Wi-Fi hotspots, these are often weak, and if you have a limited plan on your device as well, your chances of browsing the web on your Android device are very limited indeed. In such instances, Reverse Tether for Android could be just the solution. So long as you’ve your USB recharge / sync cable in hand, you can take advantage of your computer’s fast, secure internet connection without incurring any extra charges.


unnamed (3)

Once you’re online, you can continue to play games, browse the web, sync mail, or download updates without any hassle at all, and although Reverse Tether does cost five dollars, there’s a free trial version allowing you to preview the product before parting with any money.

unnamed (4)

Of course, in order to establish the connection, your Android device must be rooted. Additionally, it will only work on devices with a tether option, and your desktop will naturally need to have an internet connection. There’s no additional software requirement on the part of your desktop/laptop, and all you’ll need to do is edit Network Connections (explained in more detail in-app).

unnamed (5)

Download Reverse Tether for Android [Google Play link]
Though I’d recommend you go with the Reverse Tether app, since it offers a free trial and it’s hassle free.
Download it, give it a whirl, and let us know how it runs for you by dropping a comment via the usual mediums below.
Be sure to check out our Android Apps gallery to explore more apps for your Android device.


Source : Redmond Pie